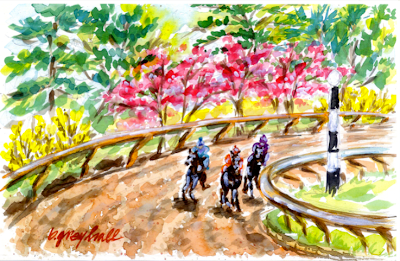
The Kentucky Derby offers the perfect excuse to indulge. Ladies wearing hats, gents in bowties, and freshly crushed mint floats through the air as juleps are passed. The nervous energy of horse-talk is channeled into betting. The perfect time of year to sport my equestrian-themed handbag.
A few years ago, I painted a cigar box for a jaunt to Atlanta’s Steeplechase event - it only seemed appropriate to imagine the scene of horses leaping over hedges and loosely capture in a painterly expression on the box façade, with bordering edges adorned by silks and jokey caps. Thanks to some help from my Dad to add a beaded wooden handle, instantly what was a simple rectangular container became a fashionable accessory. (My wonderful Dad - he’s such a good sport to lend a hand when it comes to all of my projects!)

But ladies, now it’s just as easy for you to recreate this same look! Last week at Michael’s Crafts, I noticed they have all sorts of boxes (rectangles, squares, trapezoids) that already have a closure – and better yet – handles!!! (Those are the hardest part to attach and tighten.) Just a few simple steps and you’ll be walking the streets with a one-of-a-kind handbag creation of your own, looking as though you’re hot off Madison Avenue.
1. Find a picture of a scene you’ve photographed, cut from a coffee table book, or even a postcard of a beautiful landscape (any subject matter that inspires you will be perfect)
2. If the picture is bigger than the box façade, trim the edges so it is perfectly flush (but do not yet attach)
3. Look for complimentary wrapping paper or decorative tissue that has a pattern that’s suitable as a companion to your primary image. Decoupage (Elmer’s glue that has been thinned down with water works too) the tissue to the outside edge of your boxes and back of the purse. It’s okay if the edges overlap on the front, you’ll hid them with your hero image and ribbon trim. Tuck the other end of the tissue over the edge into the interior of the box; this will be hidden by fabric or contact paper.
4. Now decoupage your landscape to the front of the box from Michael’s ( http://www.michaels.com/art/online/projectsheet?pid=e09013) . If you’ve decided to use a photograph, make a high-quality color copy and use this (an actual photograph will warp).
5. Line the interior of the box with fabric or contact paper. Don’t worry if the edge isn’t perfectly finished. You can hide many imperfections with trim!
Happy Crafting!
The Painted Memory
www.thepaintedmemory.com


Great idea --it looks lovely with your dress too!
ReplyDelete